Disclosure: This post may contain affiliate links, meaning if you decide to make a purchase through my links I may earn a commission at no additional cost to you. See my disclosure for more info.
Ever wanted to make that delicious fried cheese appetizer you see at Greek restaurants? Well, you’re in luck! Making saganaki at home is actually pretty simple. It’s a classic Greek dish that’s perfect as a starter. We’ll walk through what saganaki is, how to pick the best cheese, and how to cook it up so it’s crispy on the outside and gooey on the inside. Get ready to impress your friends and family with this easy, tasty treat.
Key Takeaways
- Saganaki refers to dishes cooked in a special two-handled pan, but most commonly means pan-fried cheese.
- Choosing the right cheese is important; traditional Greek options like graviera or kefalotyri work best, but firm alternatives like Monterey Jack or provolone can also be used.
- The simple process involves dredging the cheese in flour and then shallow-frying it in olive oil until golden brown on both sides.
- Serving saganaki immediately while it’s hot is key to enjoying its crispy exterior and melted interior.
- While not traditional in Greece, flambéing saganaki with brandy or ouzo is a popular Greek-American custom that adds a bit of flair.
Understanding Saganaki
What is Saganaki?
Saganaki is a classic Greek appetizer that’s all about the cheese. We’re talking about a piece of cheese, usually a firm, salty variety, that gets a quick, hot sear in a pan. The goal is to get a beautiful golden-brown crust on the outside while keeping the inside wonderfully melty and gooey. It’s simple, really, but oh-so-satisfying. Think of it as the Greek answer to fried cheese, but with its own unique character.
The Meaning Behind the Name
The name "saganaki" actually comes from the Greek word for a small, two-handled frying pan, "sagani." So, when you order saganaki at a restaurant or make it at home, you’re essentially making "pan-fried cheese." It’s a direct nod to the cooking vessel that makes this dish possible. It’s not a type of cheese itself, but rather the method of preparing it in that specific pan.
Explore more NutritionGeeks guides related to wellness, recovery, nutrition and active lifestyle support.
Choosing the Right Cheese for Saganaki
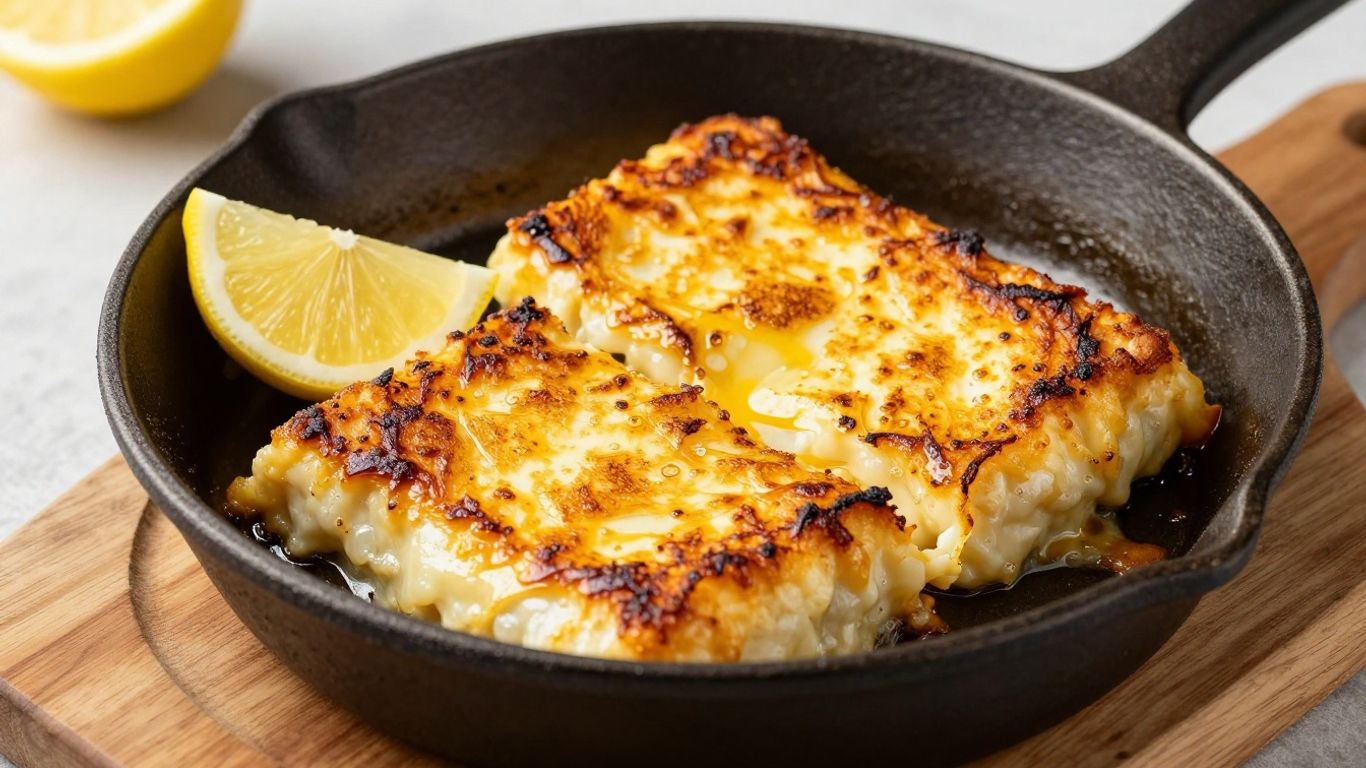
Okay, so you want to make saganaki. The absolute most important part of this whole deal is picking the right cheese. Seriously, mess this up and you’re not getting that glorious crispy crust and gooey center we’re all after. It’s not just about slapping any cheese in a pan; you need something that can handle the heat without just turning into a sad, melty puddle.
More NutritionGeeks Wellness Guides
Explore more NutritionGeeks guides connected to wellness, recovery, hydration, energy, sleep and active lifestyle nutrition.
Traditional Greek Cheese Selections
When you’re aiming for authentic, you’ll want to look for cheeses that are native to Greece. These have been used for ages for a reason. They’re firm, a little salty, and have a great texture for frying.
- Kefalograviera: This is often considered the gold standard. It’s a hard cheese made from sheep’s and goat’s milk, giving it a nice salty and nutty flavor. It browns up beautifully and stays mostly intact, which is exactly what you want.
- Kasseri: A bit softer than Kefalograviera, Kasseri has a more elastic, almost mozzarella-like stretch. It’s still a good choice, though it might not get quite as crispy.
- Graviera: Similar to a Swiss cheese like Gruyère, Graviera is a bit milder and buttery. It’ll get a nice golden color but might not have the same salty punch.
- Kefalotyri: This one is dense, firm, and quite briny. It fries well, but be careful not to overcook it, or it can get a bit dry.
Ideal Alternative Cheeses
Don’t live near a specialty Greek market? No worries. There are other cheeses that can get the job done, though they might require a little extra help.
- Halloumi: This Cypriot cheese is a popular substitute because it’s widely available and holds its shape really well when fried. It has a mild flavor and a unique
Preparing Your Saganaki
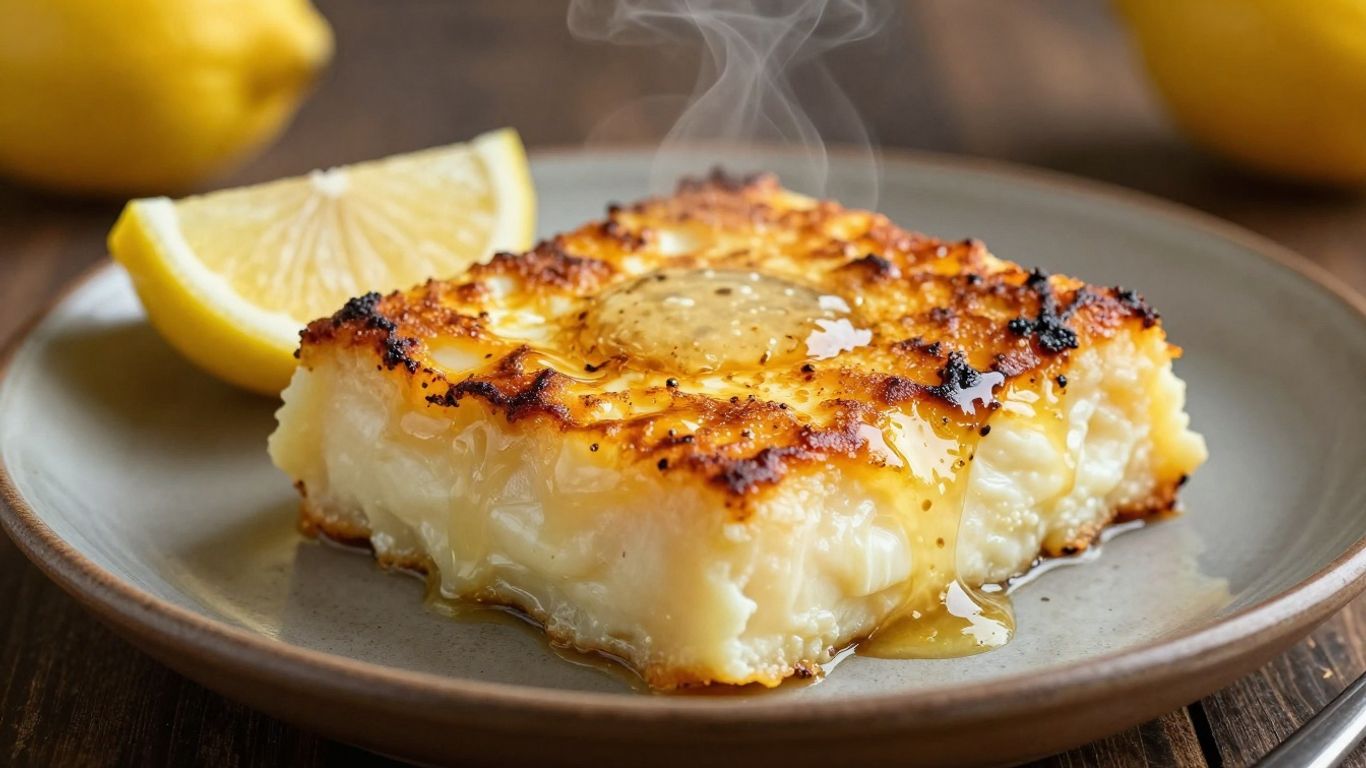
Alright, so you’ve got your cheese, you’ve picked out your pan, and you’re ready to get this party started. The preparation for saganaki is actually super straightforward, which is one of the reasons I love it so much. It’s all about getting that cheese ready for its close-up in the hot pan.
The Simple Dredging Process
First things first, you’ll want to get your cheese ready. If you’re using a cheese that might get a little too soft or doesn’t have a natural crust, a light coating of flour is your best friend. It helps create that perfectly crispy exterior we’re all after. Just grab some all-purpose flour and give your cheese slices a gentle dredge. Make sure to shake off any excess flour – you don’t want a thick, pasty layer, just a light dusting. This step is pretty quick, maybe a minute or two per slice, depending on how many you’re making. It’s a simple step, but it makes a big difference in the final texture.
Ensuring the Perfect Crust
Getting that golden, crunchy crust is the name of the game. Beyond the flour dredge, the real secret is making sure your pan and oil are properly heated before the cheese hits them. You want the oil to be shimmering, not smoking like crazy, but definitely hot enough to immediately start crisping up that flour coating. Think of it like giving the cheese a warm hug that quickly turns into a firm handshake. This initial sear is what locks in the melty interior and prevents the cheese from just melting into a puddle. A well-preheated pan is key to achieving that satisfying crunch. If you’re looking for a bit more detail on getting that sear just right, check out this guide on making Feta Saganaki.
Here’s a quick rundown of what you’re aiming for:
- Cheese Prep: Lightly dust slices with flour, shaking off excess.
- Pan Heat: Medium-high heat is your friend here.
- Oil: Just enough to coat the bottom of the pan, shimmering but not smoking.
- Timing: Don’t overcrowd the pan; cook in batches if needed.
Remember, the goal is a beautiful golden-brown crust on the outside with a wonderfully gooey, melty center. It’s a delicate balance, but with a little attention, you’ll nail it.
Cooking Your Saganaki to Perfection
Alright, so you’ve got your cheese ready to go, maybe it’s dusted in a little flour, maybe not, depending on your cheese choice. Now comes the fun part: actually cooking it. This is where the magic happens, turning that firm block of cheese into a golden, crispy delight.
Shallow Frying vs. Deep Frying
When it comes to cooking saganaki, you’ve got a couple of options, but honestly, one is way better than the other for this dish. Deep frying might seem like the go-to for anything crispy, but for saganaki, it’s just not necessary and can actually make things worse. You end up with a thick, oily crust that can overpower the cheese. Plus, it uses a ton of oil. Shallow frying, on the other hand, is the way to go. You only need enough good quality olive oil to come partway up the side of the cheese. This method gives you that perfect, thin, golden crust without making the whole thing greasy. It’s all about getting that nice sear without drowning the cheese.
Achieving a Golden Sear
Getting that beautiful golden-brown crust is the goal here. First things first: make sure your pan is hot. We’re talking medium-high heat. Add a good glug of olive oil – enough to coat the bottom generously. You want it to shimmer, maybe even give off a faint wisp of smoke. That’s your cue that it’s ready. Carefully place your cheese into the hot oil. Don’t overcrowd the pan; cook in batches if needed. Let it sizzle and bubble. You’ll see the edges start to turn golden. Keep an eye on it; this happens fast! You’re looking for a nice, even color all around. A thin, flexible spatula is your best friend here for flipping it over to get the other side. You want that beautiful, caramelized crust, not burnt bits.
The Importance of Serving Temperature
This is super important, folks. Saganaki is best served immediately. Like, right out of the pan, still sizzling. As it cools, the cheese starts to firm up again, and that lovely gooey texture disappears. The crust can also get a bit tough. So, have your plates ready, maybe warmed up a bit, and get it onto the table as soon as it’s done. It’s meant to be enjoyed hot and melty, with that contrast between the crispy outside and the soft inside. Seriously, don’t let it sit around. The whole experience is about that immediate gratification. You can find some great tips on preparing saganaki to make sure it’s ready to go the moment it hits the pan.
To Flambé or Not to Flambé
The Greek Tradition
If you visit a small taverna in Greece, you’ll almost never see saganaki arriving at your table engulfed in flames. In the Greek tradition, cheese saganaki is served straight from the skillet—hot, with a golden crust, no spectacle, no fire. It’s about respecting the cheese and letting its flavor shine without extra fuss. Greek cooks care much more about the quality of the cheese, the texture of the crust, and serving immediately so it’s soft and salty inside.
The Greek-American Tradition
In Greek-American restaurants, though, saganaki flambé has become a show in itself. Back in the 1960s, a classic Chicago restaurant started the trend: cheese arrives at your table, someone pours over a splash of brandy or ouzo, a lighter comes out, and everyone yells ‘Opa!’ as flames dance up. The performance is fun, but it’s not the way most Greeks enjoy the dish at home or in Greece. The flambé version is all about theater—part celebration, part dramatic touch for the senses.
Adding Flair with Brandy or Ouzo
Want to add a little drama to your next dinner party? Flambéing saganaki is actually easier than you’d expect:
- Pull your pan off the heat before adding alcohol.
- Pour in about half an ounce of brandy or ouzo—don’t use too much and never pour straight from the bottle.
- Return the pan to the heat and let the alcohol catch fire, or carefully ignite it with a long lighter.
- Let the flames burn off naturally in a few seconds, then squeeze a lemon over the cheese.
Always take proper safety steps. The flames can shoot up quickly. Use a long match or lighter, keep a safe distance, and flambé in a well-ventilated area. Never pour alcohol directly over the heat.
| Style | Alcohol Used | Typical Setting | Show Factor |
|---|---|---|---|
| Greek | None (served plain) | Tavernas, home | Low |
| Greek-American | Brandy or Ouzo | Restaurants, parties | High |
Flambé or not, what matters most is serving your saganaki fresh and hot so that every bite is melting and crisp at the same time. Don’t let it wait—or all your work will lose its wow factor.
Serving Your Delicious Saganaki
Classic Accompaniments
So, you’ve got this beautiful, golden, crispy-on-the-outside, gooey-on-the-inside cheese. What do you do with it? Well, the most straightforward way to enjoy saganaki is with some good, crusty bread. Think of it as your edible spoon for scooping up every last bit of that cheesy goodness and any pan drippings. Warm pita bread works just as well, offering a softer contrast to the cheese’s crisp exterior.
Pairing with Other Greek Dishes
Saganaki really shines as part of a larger Greek feast. It’s a fantastic starter before diving into heartier mains. Imagine serving it alongside a crisp Greek salad, maybe some tender grilled lamb chops, or even a classic moussaka. It also fits right in on a mezze platter, mingling with olives, hummus, tzatziki, and dolmades. It’s that perfect salty, rich bite that sets the stage for more flavors.
Sweet and Savory Variations
While the classic is just cheese, a little something extra can really make it sing. A squeeze of fresh lemon juice right before serving is almost non-negotiable for me. It cuts through the richness and adds a bright, zesty note. And for a touch of sweetness that plays off the salty cheese, a light drizzle of honey is a game-changer. It sounds a bit unusual, but trust me, the sweet and savory combo is addictive. Some people even like to add a sprinkle of fresh herbs like oregano or thyme to the flour coating before frying for an extra layer of flavor.
Remember, saganaki is best enjoyed immediately after cooking. That crispy crust and molten interior are fleeting, so have your plates and accompaniments ready to go the moment it comes out of the pan. It’s a dish meant for sharing and enjoying in the moment.
Enjoy Your Homemade Saganaki!
So there you have it! Making saganaki at home is pretty straightforward, right? You just need a few things and a little bit of time. Whether you decide to flambé it or not, serving this golden, crispy cheese appetizer is always a win. It’s perfect for sharing with friends or just treating yourself. Don’t be afraid to experiment with different cheeses if you can’t find the traditional ones. The most important thing is to serve it up hot and enjoy that amazing gooey center. Opa!
Frequently Asked Questions
What exactly is saganaki?
Saganaki is a delicious Greek appetizer made from cheese that’s fried until it’s golden brown and crispy on the outside, but still wonderfully soft and melty on the inside. The name ‘saganaki’ actually comes from the small, two-handled pan it’s traditionally cooked in.
What kind of cheese should I use for saganaki?
Traditionally, Greek cheeses like Kefalotyri, Kefalograviera, or Graviera are used. These are firm cheeses that hold their shape when heated. If you can’t find them, don’t worry! Cheeses like Monterey Jack, provolone, or even a firm halloumi can work well too. The key is a cheese that won’t completely melt into a puddle.
Do I need to use flour for saganaki?
Many recipes call for lightly dusting the cheese in flour before frying. This helps create a beautiful, crispy crust and stops the cheese from sticking too much. Some chefs prefer not to use flour for a lighter coating, but it’s a common and effective step for getting that perfect texture.
Is it true that saganaki is sometimes set on fire?
Yes, that’s called flambéing! While it’s not traditional in all parts of Greece, it’s a popular and exciting addition in Greek-American restaurants, especially in places like Chicago. A bit of brandy or ouzo is poured over the hot cheese and lit, creating a dramatic flair before being extinguished with lemon juice. It’s totally optional but adds a fun show!
How should I serve saganaki?
Saganaki is best served immediately while it’s still hot and gooey. A squeeze of fresh lemon juice right before serving is a must – it cuts through the richness of the cheese. It’s great on its own, with crusty bread for dipping, or as part of a larger Greek meal with dips and salads.
Can I make saganaki at home?
Absolutely! Making saganaki at home is surprisingly simple. You only need a few ingredients – cheese, flour (if using), and olive oil for frying. With just a few minutes of cooking, you can enjoy this classic Greek appetizer right in your own kitchen.
You may also find this Nutrition Geeks guide helpful: Authentic Shrimp Saganaki: A Taste of Greek Sunshine with Tomatoes and Feta.
You may also find this Nutrition Geeks guide helpful: Mastering Orecchiette: Simple Techniques and Delicious Dishes.
You may also find this Nutrition Geeks guide helpful: The Ultimate Overnight Blueberry French Toast Recipe.
You may also find this Nutrition Geeks guide helpful: Quick & Zesty Garlic and Lemon Shrimp Pasta Recipe.